Setting Up Billing
Configure GRADR to collect membership payments from your students. This tutorial walks you through every step of first-time billing setup, from connecting Stripe to assigning a first student to a tier.
All gym-level billing controls live under one tab: Settings → Payments.
Prerequisites
- A Stripe account. If you don't have one, create it at stripe.com before starting.
- At least one student added to GRADR (see Onboarding a New Student)
Step 1: Connect Stripe
Stripe handles every student card payment, both one-time charges and recurring subscriptions. You connect it once and GRADR manages billing from there.
- Go to Settings → Payments.
- In the Stripe Connect section at the top, click Connect Stripe Account.
- Complete the Stripe OAuth flow. You'll be redirected to Stripe to authorise the connection, then returned to GRADR.
- The status badge flips to Connected once setup is finished.
If you see Onboarding Incomplete, Stripe still needs more information about your business. Click Resume Stripe Setup to finish.
You cannot save Payment Settings (next step) until Stripe is in the Connected state.
Step 2: Set Your Billing Currency
Set your currency before creating any membership tiers. The dropdown locks as soon as any active tier exists.
- Scroll to the Payment Settings section.
- From the Billing Currency dropdown, pick your currency.
- Click Save Payment Settings.
Currency is locked once you have an active membership tier. If you need to change it later, you must deactivate every tier first, change the currency, then recreate the tiers.
Step 3: Configure Payment Defaults
In the same Payment Settings section, three more controls shape how billing behaves:
- Grace Period After Failed Payment — 3, 7, 14, or 30 days. How long a student can keep attending after a Stripe payment fails before they're auto-suspended. Default is 7.
- Block Suspended Students at Kiosk — when on, suspended students cannot check in at the kiosk. Turn off if you'd rather sort payment out gym-side.
- Contract Renewal Lead Time — days before a contract tier's commitment-end date that the student appears in the Contracts ending soon dashboard card. Default is 7. Only relevant if you use contract tiers.
Set these to reasonable defaults; you can change them any time. Click Save Payment Settings when done.
Step 4: Configure Cash Payment Reminders (Optional)
If any of your students pay cash rather than via Stripe, configure how GRADR surfaces upcoming cash payments.
- In the Cash Payment Reminders section, set the Reminder window — how many days before a cash payment is due to surface the student in alerts. Default is 3.
- (Optional) Toggle Auto-reminders on if you want GRADR to email students automatically when their due date enters the reminder window.
- Click Save changes.
GRADR never sends SMS reminders automatically. SMS is only sent when you click the manual "Send Reminder" button on a student's billing tab.
Step 5: Create Your Membership Tiers
Tiers define what you charge and how often. Create one tier per plan you offer.
- Scroll to the Membership Tiers section and click Add Tier.
- Enter the Tier name (e.g. "Adults — Unlimited", "Kids Unlimited").
- Pick the Tier type: Recurring for an ongoing membership, Fixed-duration for a one-time pass like a 30-day intro special.
- Fill in the price, billing cycle (for recurring) or duration in days (for fixed-duration), and session limit.
- (Recurring only) Tick Minimum commitment (contract) if this tier should lock the student in for a number of months and roll onto a successor tier when the commitment ends.
- Click Create Tier.
For the full tier configuration reference, see Membership Tiers.
Step 6: Assign Billing to a Student
Now that tiers exist, you can assign one to a student.
- Open the student's profile in Students and click Edit.
- Scroll to the Billing section.
- Pick a Payment Method:
- Stripe (Online Payment) — the student is enrolled in a Stripe subscription. They'll receive a checkout link to enter their card details.
- Cash / Manual — you record cash payments manually. GRADR will surface upcoming and overdue cash payments in the Dashboard and on the student's profile.
- Pick the Membership Tier. The price comes from the tier; for cash students the amount isn't entered separately here.
- Click Update Student.

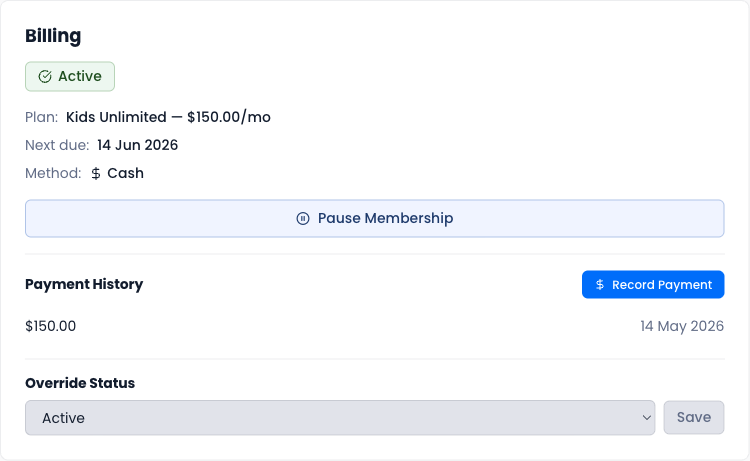
Billing is now active for that student. The student's Billing tab on their profile will show the current plan, payment status, next due date (Cash) or next billing date (Stripe), and a payment history.
Step 7: Link Family Members (Optional)
If a parent pays a single membership that covers multiple children (or one student pays for a partner), use family billing to link the dependents to the holder's subscription.
- Open the dependent student's profile and click the Billing tab.
- Scroll to the Family Billing section.
- Choose the billing holder from the dropdown and click Link.
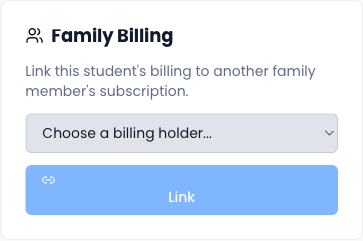
The dependent now inherits the holder's tier and payment status. If the holder's tier changes, including contract renewals, the dependent's tier updates automatically. Unlink at any time from the same section.
Step 8: Connect PayPal for Instructor Payroll (Optional)
PayPal is used for paying your instructors from the Payroll page. It's not a student payment option; all student payments go through Stripe.
If you plan to pay instructors through GRADR:
- In Settings → Payments → PayPal, click Connect PayPal Account.
- Complete the PayPal OAuth flow.
See Running Payroll for the full payout flow. Each instructor will also need to add their own PayPal email to their profile before you can pay them.
What Happens Next
- Subscriptions: to cancel a student, change tier, or issue a refund, do it on the student's profile in GRADR. Stripe is kept in sync automatically. For deeper dispute handling, use your Stripe dashboard.
- Contracts: if you assigned a contract tier, watch the Contracts ending soon card on your dashboard as the commitment-end date approaches. Use Renew to roll the student onto the successor tier, or Decline to cancel.
- Cash: the Dashboard surfaces students with cash payments coming due (within your reminder window). Send manual reminders from each student's Billing tab.
For reference on any setting above, see Payments and Membership Tiers.
Related
- Settings — Membership Tiers — the tiers students are billed on
- Tutorial: Onboarding a New Student
- Tutorial: New Gym Setup