Recording a Sale
This tutorial walks through ringing up a single sale at the register, from adding a product to taking payment by cash or card. For full details on every Point of Sale screen, see the Point of Sale reference.
Prerequisites
- Your POS currency must be confirmed. See Point of Sale → Getting Set Up.
- You need at least one product in your catalog. See Point of Sale → Products.
- To take card payments, a Stripe account must be connected. Cash sales work without one.
1. Open the Register
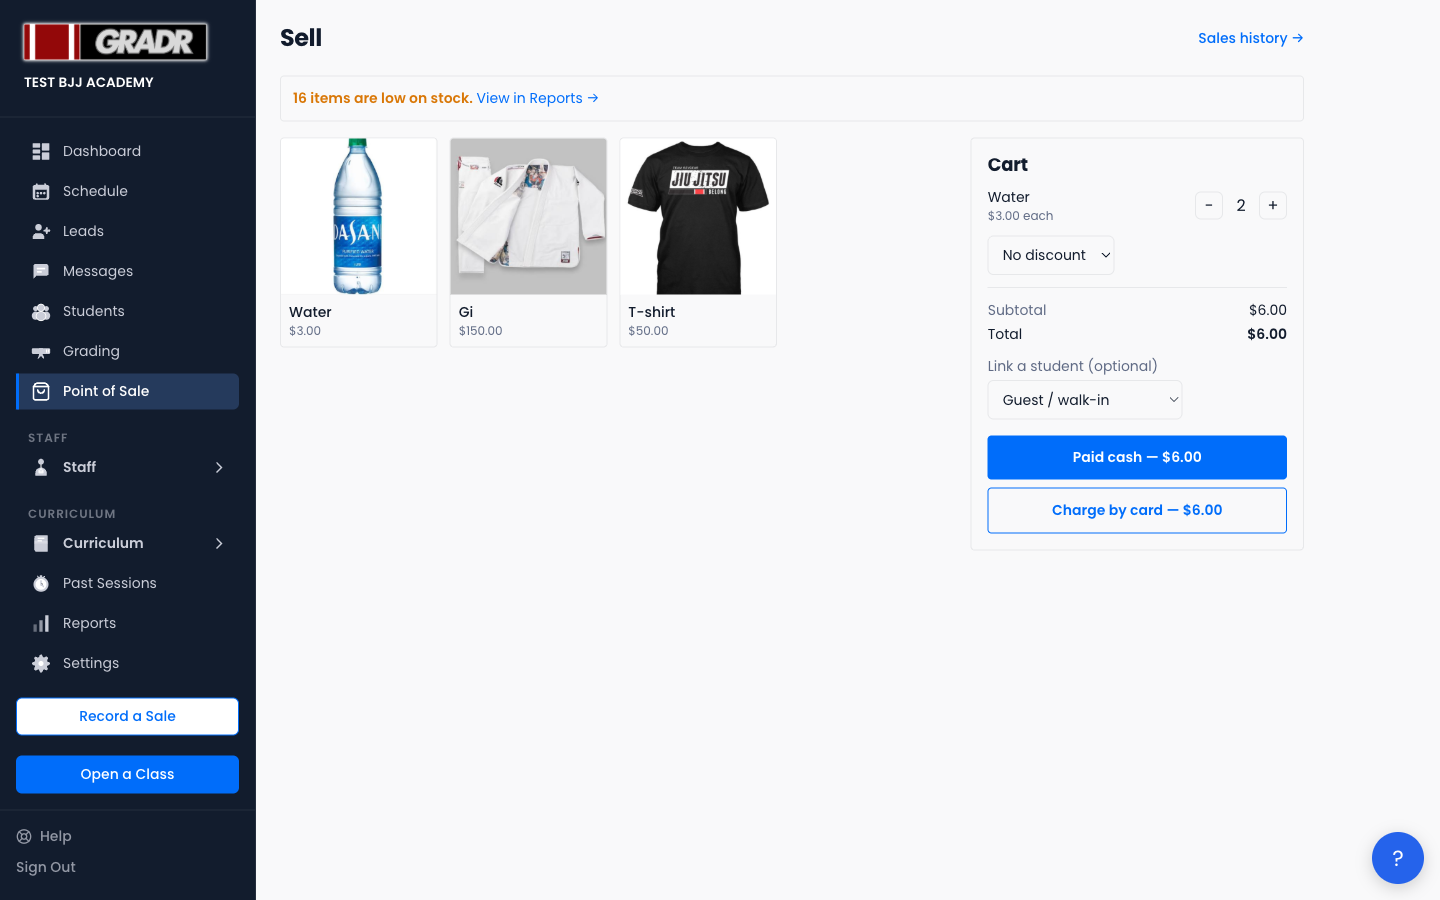
Click Record a Sale in the sidebar, or open Point of Sale and tap Sell.
2. Build the Cart
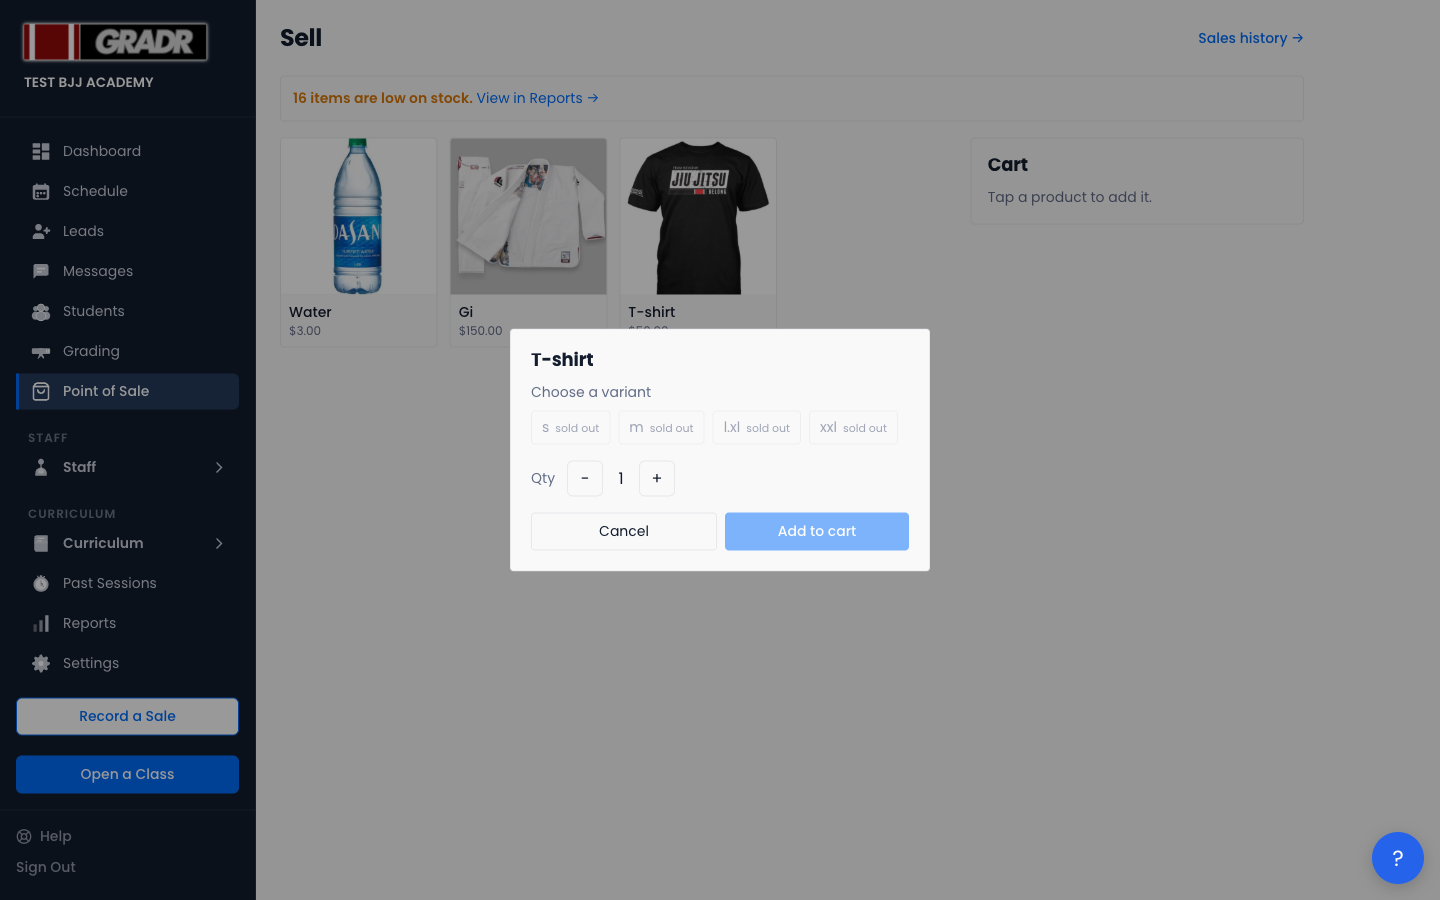
Tap a product to add it. If it has variants, choose the variant and quantity, then tap Add to cart.
Repeat for each item. Adjust quantities in the cart with the − / + steppers; setting a quantity to zero removes the line.
3. Apply a Discount (Optional)
In the cart, choose Flat amount or Percent, enter the value, and the cart total updates immediately.
4. Link a Student (Optional)
Use the Link a student dropdown to attach the sale to a member, or leave it as Guest / walk-in. It only appears once your gym has at least one student.
5. Take Payment
Cash
Tap Paid cash. The sale completes instantly: GRADR records it, freezes the line items, and decrements stock, then shows a confirmation and clears the cart for the next sale.
Card
Tap Charge by card. GRADR shows a QR code for the customer to scan and pay on their own phone.
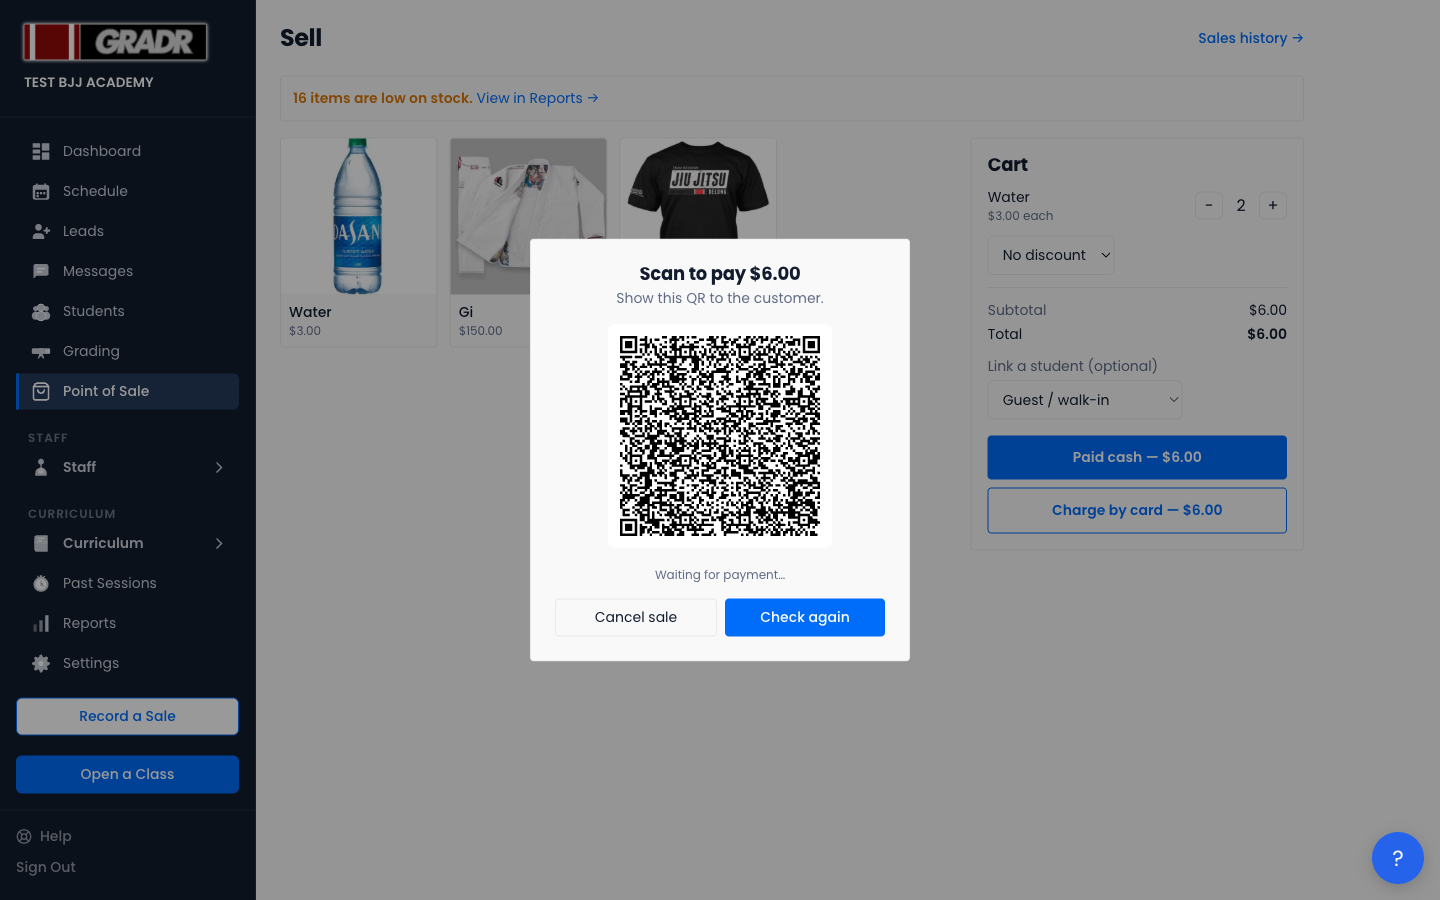
- Payment usually confirms within a few seconds and the register resets automatically.
- If the customer has paid but the screen is still waiting, tap Check again.
- If the customer changes their mind, tap Cancel sale. Nothing is charged and no stock moves.
6. Check It Later
Every completed sale appears in Sales history, with its frozen line items, payment method, and total, and you can void a cash-sale mistake there to reverse the stock and remove it from revenue, though for card sales you'll need to refund through Stripe instead. See the Point of Sale reference for more on sales history, voids, and reports.
Related
- Students — linking a sale to a student profile
- Settings — Payments — the Stripe connection card sales use