New Gym Setup
When you first log in to GRADR, the Dashboard shows a Get Started checklist covering the 11 steps needed to go from a fresh account to a fully operational gym. Complete them in order. Later steps depend on earlier ones.
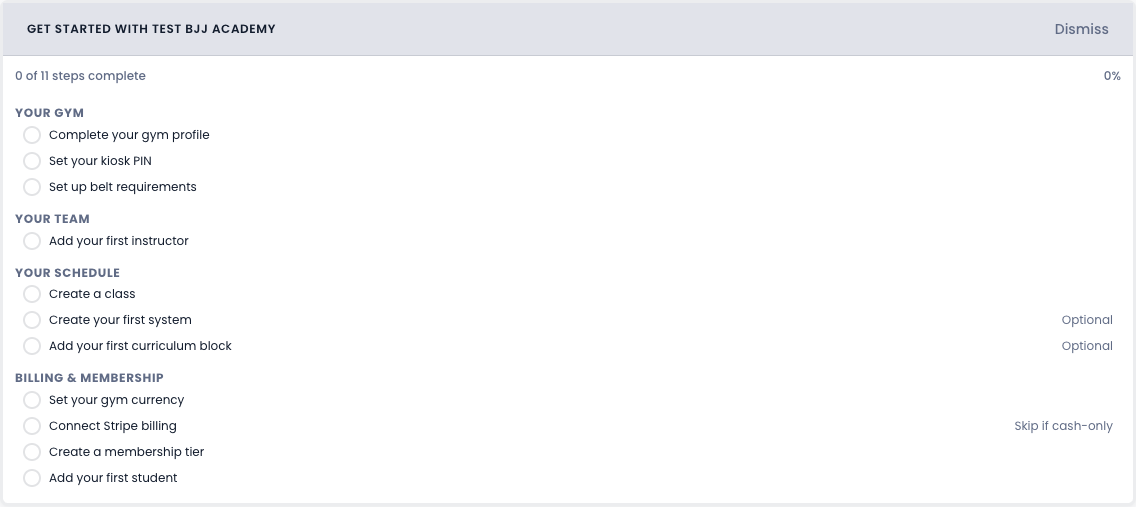
Your Gym
Complete your gym profile
Add your gym name, city and country, contact details, and logo, all of which appears in student-facing emails and the booking portal.
See Gym Profile for field-by-field reference.
Set your kiosk PIN
The kiosk is used for student check-ins at the mat, and new gyms start with the PIN 0000. Change it. Set your own 4-digit PIN so only staff can leave kiosk mode and return to the owner portal.
See Kiosk for how the kiosk works.
Set up belt requirements
Define the criteria students must meet to be promoted at each belt level, so GRADR can use them to surface promotion-ready students on the Dashboard.
See Belt Requirements for setup details.
Your Team
Add your first instructor
Add the instructors who teach your classes. They get assigned to class sessions and show up in payroll once they do.
See Instructors for how to add and manage instructors.
Your Schedule
Create a class
Set up the recurring classes you run each week, with a name, time, day, and assigned instructor for each one.
See Building a Class Schedule for a step-by-step walkthrough.
Review your curriculum (Optional)
Your gym was created with a template curriculum already loaded, so Areas, Systems, and Lessons are all there waiting for you and you don't need to build one from scratch. Have a look through Curriculum → Areas, Systems, and Lessons, and adjust anything that doesn't match how you teach. Nothing reaches your students until you publish it, because the template lessons arrive unpublished.
See Areas, Systems, and Lessons for reference.
Add your first curriculum block (Optional)
Curriculum blocks are the rotating lesson plans that run across a set period, and they're the one part of the curriculum not created for you. This is where you'll do the building.
See Creating a Curriculum Block for a walkthrough.
Billing & Membership
Set your gym currency
Choose the billing currency all your membership tiers and payments use, and set this first. Once you've created an active tier, the currency locks, and you'd have to remove every tier to change it.
See Membership Tiers for how currency relates to your tiers.
Connect Stripe billing (Skip if cash-only)
Connect your Stripe account. GRADR needs it to process recurring membership payments by card.
See Setting Up Billing for the full billing setup walkthrough.
Create a membership tier
Tiers define what you charge and how often, and you should create one tier per plan you offer before assigning billing to students.
See Membership Tiers for reference.
Add your first student
Add a student. Then assign their membership tier and set their billing method.
See Onboarding a New Student for a step-by-step walkthrough.
Related
- Dashboard — the setup checklist this tutorial walks through
- Settings — full settings overview
- Tutorial: Setting Up Billing